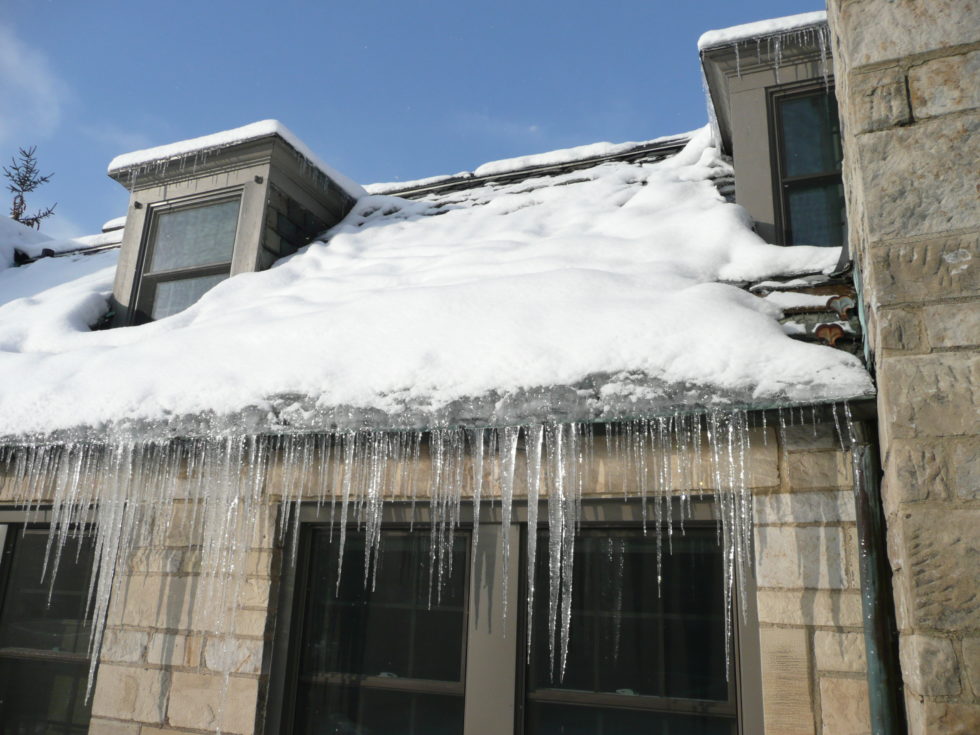
To homeowners in snowy, cold-winter climates, ice dams are a familiar sight. To the uninitiated, ice dams can be somewhat mysterious. An ice dam is a mass of ice that gathers along the lower edge of a roofline where it overhangs the edge of the home.
Ice dams are more than just an interesting phenomenon. Severe ice dams can weigh many hundreds of pounds. This can compromise the structure of the roof eaves. Ice dams can also cause meltwater to back up under the shingles, where it can flow down and ruin ceiling and wall surfaces. This can cause serious damage to your roof, gutters, paint, insulation, interior drywall, and other surfaces.
So why would one house be burdened with huge blocks of ice thickly covering the roof eaves, while adjacent homes have only a bright cap of snow over the shingles with no signs of ice at all? The answer can usually be found in the attic.
Ice dams begin when the snow melts on a warmer part of a roof. Then the water flows down to the colder eave overhang, where it refreezes. There, the ice will accumulate. It forms a blockage that prevents additional snowmelt from flowing off the roof. The ice now begins to back up under the roof shingles, where it melts again.
This will soak the roof sheathing and begin leaking into the attic. Then it soaks the insulation, rendering it much less effective. It now may leak through the ceiling drywall below and into your living space. Large ice dams can also be very heavy and can damage gutters. They even present a safety hazard to people below.
Preventing Ice Dams
Preventing ice dams is really easy. If the air in the attic or against the bottom of the roof deck remains cold, it can never melt the snow lying on top of the roof, eliminating the water necessary for ice dams. Preventing ice dams can be done through a combination of:
- Ventilation under the roof deck, which keeps colder outside air circulating through the attic and prevents it from warming above the freezing point so it can melt snow on the roof.
- Insulation in the ceiling below the attic, which will prevent warm air from rising up into the attic space to melt snow on the roof.
- Blocking any heat sources that may be contributing to high temperatures in the attic.
Houses with good attic ventilation generally do not experience ice dams. By circulating cool outside air in the attic space, the roof surface remains below freezing and cannot melt the snow on the roof. Although it’s contrary to what many people believe, a cold attic actually means no ice dams!
- Ridge Vents: Where the spaces between rafters are insulated, you can create a continuous airflow from the soffit to the peak of the roof. A soffit-and-ridge vent system usually requires insulation baffles installed on the lower side of the roof, above the exterior walls. The baffles hold back the insulation by 1 to 2 inches, creating a channel for air to flow freely past the insulation. Without them, thick insulation can block the air coming in through the soffit vents, eliminating airflow. These insulation baffles must be combined with a ridge vent that allows air to flow up through the baffles on a continuous path to outdoor air.
- Other Ventilation: If a soffit-and-ridge system is not feasible or desirable, ventilation can be provided with soffit or gable vents for intake air and several conventional roof vents for exhaust air. As a general guideline, ventilation systems should provide 1 square foot of net free ventilation per 150 square feet of attic floor space. Net-free ventilation is the total area of openings in a vent, minus all screening or other obstructions.
Adequate ventilation of the rafter spaces against the roof deck, or of the attic itself, will keep the roof deck cool enough that it won’t melt the snow on the roof. This prevents roof dams before they can get started.
Preventing Ice Dams by Insulating
The next best method to lower temperatures against the roof deck is by insulating the ceiling in living spaces below the attic or against the inside surface of the roof. If you have an open attic, this means insulating the floor of the attic. If you have a finished second story in which a finished ceiling is directly against the roof, this means insulating the rafter spaces (in combination with ventilation baffles). These methods of insulating will prevent heat from rising up to the roof deck and heating it to a point where it can melt snow on the roof.
Sealing air channels from the living space below the attic is just as important as the insulation itself. Gaps around plumbing pipes and around chimneys can be a significant source of heat flow into the attic from the spaces below. Seal these gaps as part of the overall insulation strategy.
The benefit of a comprehensive insulation effort is that it not only helps prevent ice dams, but it also reduces energy costs. But be aware that insulation alone rarely is enough to prevent all ice dams. It needs to be done in conjunction with improved ventilation.
Preventing Ice Dams by Eliminating Attic Heat Sources
It’s also possible that you have heat sources in your attic that you’re not aware of. Most commonly this occurs when can lights extend up into the floor of the attic. These can radiate a surprising amount of heat into the attic—enough to heat up the air well above the freezing point, especially where ventilation is poor. Replacing these old light fixtures with modern recessed lights that can be fully insulated will help reduce the amount of heat radiated into your attic.
Other possible sources of heat include uninsulated HVAC ductwork, vents from clothes dryers, or improperly vented bathroom or kitchen exhaust fans. All of these heat sources can be wrapped in fiberglass insulation to reduce the thermal transfer of heat into the attic space.
Preventing Ice Dams With Electric Heat Cable
Improving ventilation and reducing heat sources against the inside roof surface are the best ways to prevent ice dams. However, if these methods aren’t practical, then it is possible to install electric heat cable along the edge of the roofline and gutters.
When looped in a zig-zag pattern along the edge of the roof, heat cable will prevent the melting water from cooling enough to freeze when it reaches the eaves. Instead of freezing, the meltwater flows harmlessly to the ground.
Heat cable is rather unattractive on a roof, but it does serve to prevent ice dams when installed properly. But be aware that mixing water and electricity always comes with risks. Make sure to follow the manufacturer’s directions precisely, and maintain the heat cable properly to ensure that it remains safe.
Battling Ice Dams
Preventive efforts are best conducted during the spring, summer, or fall, but there are also several options for battling them during the cold months:
- Keep gutters clean. Get rid of all those fall leaves before the snow comes. Make sure your downspouts are functioning properly. Melted snow has nowhere to go if the gutters are clogged.
- Use a roof rake after heavy snowfalls: Ice dams appear quickly after a heavy snow because of the insulating properties of snow. Using a long-handled roof rake to remove the snow from at least at lower 4 feet of roof edge can help prevent ice dams from forming. This is the only safe way to remove snow from a roof; never get onto a roof to remove snow in the winter. Make sure to use light pressure to avoid scraping the shingles too hard.
- Use calcium chloride or an ice-melt product: If you have an ice dam forming, you can apply calcium chloride or a similar product to the ice. (Forget any advice you may have heard about putting salt in pantyhose; it does not work very well, takes a lot more salt, and results in the pantyhose ripping apart).
- Chip off the ice: Although climbing onto the roof is never advised, you may be able to chip away some of the ice by hand if you can reach the eaves with an extension ladder. It is usually not necessary to remove the entire ice dam! Opening up a channel may be enough to allow additional meltwater to flow off the roof. You will have to do this several times though. The ice will quickly build up again and block the channel you have cut. A chisel, ice pick, or small hatchet are the best tools for this work but don’t attempt it if the ice dam is too high to reach safely.
- Hire a professional: When ice dam buildup is too much for you to handle, the solution is to call in some help. Professionals are insured and will remove your ice dam using special equipment such as a high-temperature/low-pressure steamer to melt the ice and snow from your roof. This service may cost a few hundred dollars. Do not hire a contractor that uses a high-pressure power washer with a steam box, which can damage shingles. If you’re looking for a contractor you can rely on, give the team at Hometown a call.